Astrill Setup Manual:How to configure DNS on network adapter on Windows XP
Jump to navigation
Jump to search
STEP 1 - Network Connections
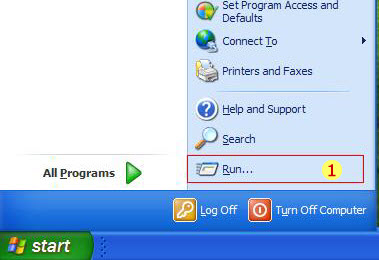
- Click on your Start up menu.
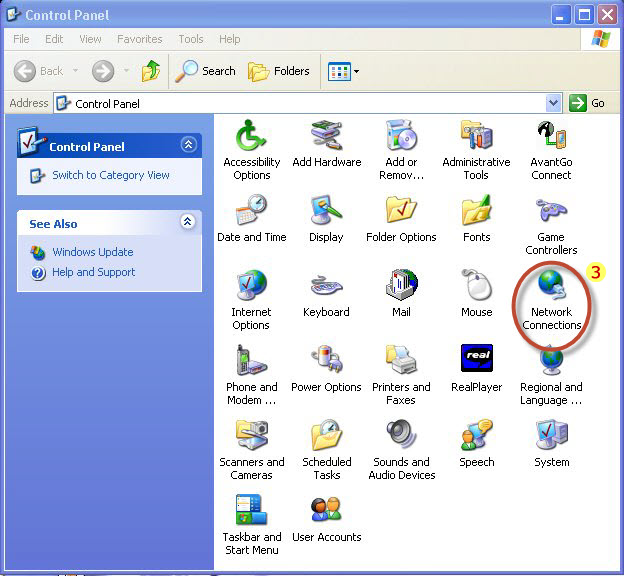
- Choose Control Panel.
- Under Control Panel, choose Network Connections.
- Then right-click on network adapter connected to the internet.
- And then select Properties.
STEP 2 - Internet Protocol
- On Properties window, in General tab, select Internet Protocol (TCP/IP).
- Then click on Properties button.
STEP 3 - Internet Protocol Properties
- Select Use the following DNS server addresses option.
- Type in 8.8.8.8 and 8.8.4.4 just like on the screen above.
- When you are done click on OK, and then click on OK again.
STEP 4 - Network Adapter Status
- Right-click on same network adapter.
- Then select Status.
STEP 5 - Connection Status Details
- On Status window, click on Support tab.
- Then click on Details... button.
STEP 6 - Network Connection Details
- Under Network Connection Details, you will see 8.8.8.8, and 8.8.4.4 as DNS servers. This is a confirmation that DNS has been set.
- Click on Close button, then click on Close button again.
STEP 7 - Run Command
- Click on your Start-up menu then click on Run..., or press Windows Key + R.
- Then on Run..., type in cmd.
- Click on OK or you can press enter.
STEP 8 - Nslookup
- In command prompt, type in nslookup google.com and press enter key, you will see 8.8.8.8 DNS server is used to resolve website google.com. This is a confirmation that DNS has been set and is working.
STEP 9 - How to clear DNS cache
- To clear DNS cache on Windows XP, type in ipconfig /flushdns and press Enter key. You will see "Successfully flushed the DNS Resolver Cache". This is a confirmation that DNS has been cleared.


