Astrill Setup Manual:How to quickly configure PPTP/ L2TP /IPSec with profile configuration install method on iPad: Difference between revisions
No edit summary |
No edit summary |
||
| Line 17: | Line 17: | ||
==Step 3== | ==Step 3== | ||
After you have made the selections, scroll down and click on "Create the config file" button. | After you have made the selections, '''scroll down''' and click on '''"Create the config file"''' button. | ||
| Line 25: | Line 25: | ||
==Step 4== | ==Step 4== | ||
Mobileconfig file will be created, click on that link to download to your iPad. | Mobileconfig file will be created, click on that link to '''download to your iPad'''. | ||
| Line 33: | Line 33: | ||
==Step 5== | ==Step 5== | ||
You will see "Install Profile" screen, tap on "Install" button. | You will see '''"Install Profile"''' screen, tap on '''"Install"''' button. | ||
| Line 41: | Line 41: | ||
==Step 6== | ==Step 6== | ||
You will get a confirmation message box, tap on "Install Now" button. | You will get a confirmation message box, tap on '''"Install Now"''' button. | ||
| Line 49: | Line 49: | ||
==Step 7== | ==Step 7== | ||
You will see "Profile Installed" on the screen, tap "Done" button. | You will see '''"Profile Installed"''' on the screen, tap '''"Done"''' button. | ||
| Line 57: | Line 57: | ||
==Step 8== | ==Step 8== | ||
Go to main screen, then tap on "Settings" icon. | Go to '''main screen''', then tap on '''"Settings"''' icon. | ||
| Line 65: | Line 65: | ||
==Step 9== | ==Step 9== | ||
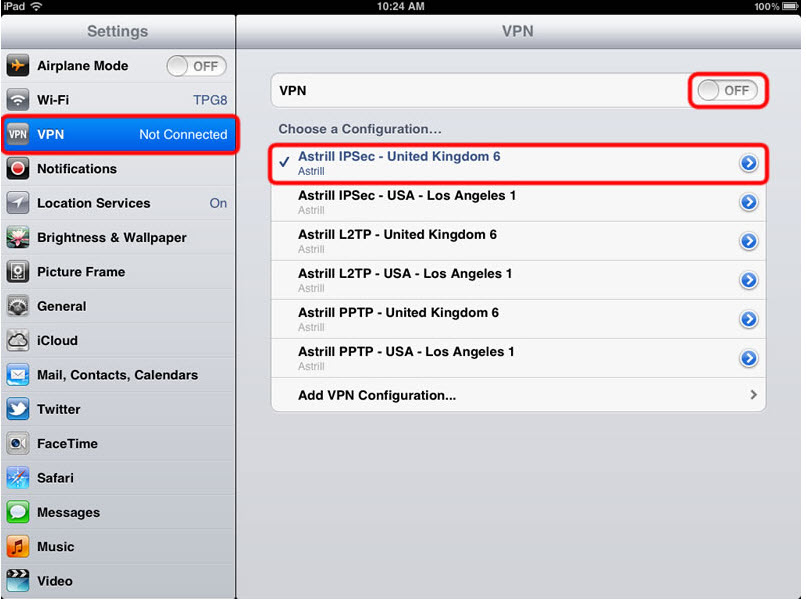
On the Settings screen tap on "VPN" item on the left hand side. You should see all VPN locations and protocols that you have installed on "Astrill VPN" profile. Select the VPN you would like to connect to, and then tap on "OFF" button to start the VPN connection. | On the Settings screen '''tap on "VPN"''' item on the left hand side. You should see all VPN locations and protocols that you have installed on "Astrill VPN" profile. '''Select the VPN''' you would like to connect to, and then '''tap on "OFF" button to start the VPN connection'''. | ||
| Line 73: | Line 73: | ||
==Step 10== | ==Step 10== | ||
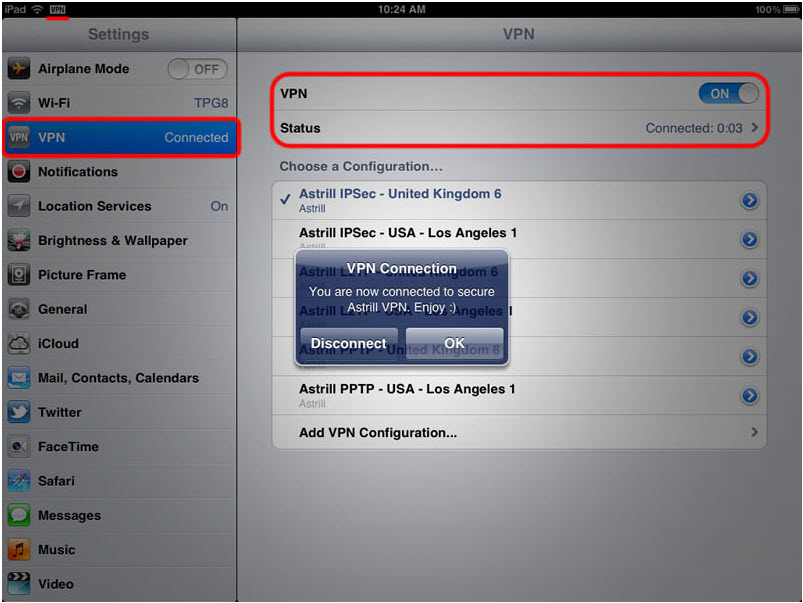
Once connected, you should see status "Connected" and VPN icon on top bar. | Once connected, you should see '''status "Connected"''' and VPN icon on top bar. | ||
Revision as of 18:35, 11 October 2012
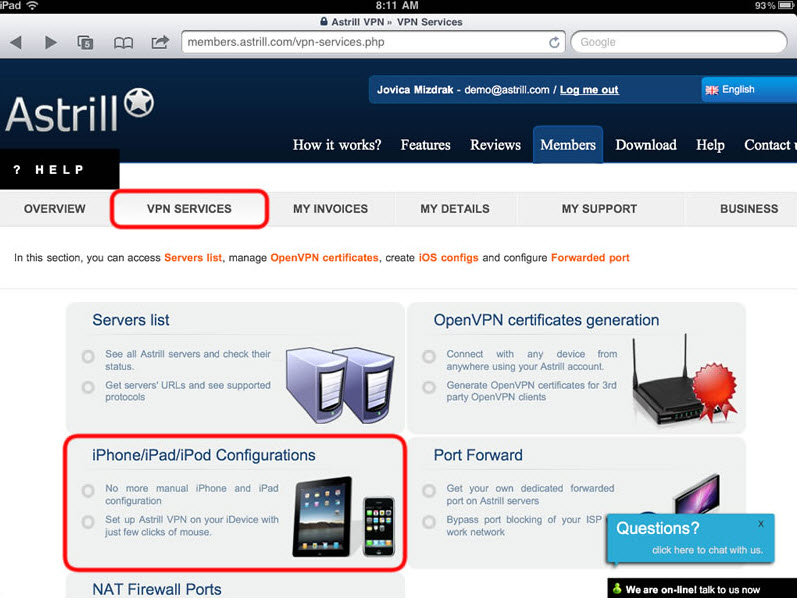
Step 1
Open Safari on your iPad, then login to Members section (https://members.astrill.com/). After that go to "VPN Services"(https://members.astrill.com/vpn-services.php) and then click on "iPhone/iPad/iPod Configurations".
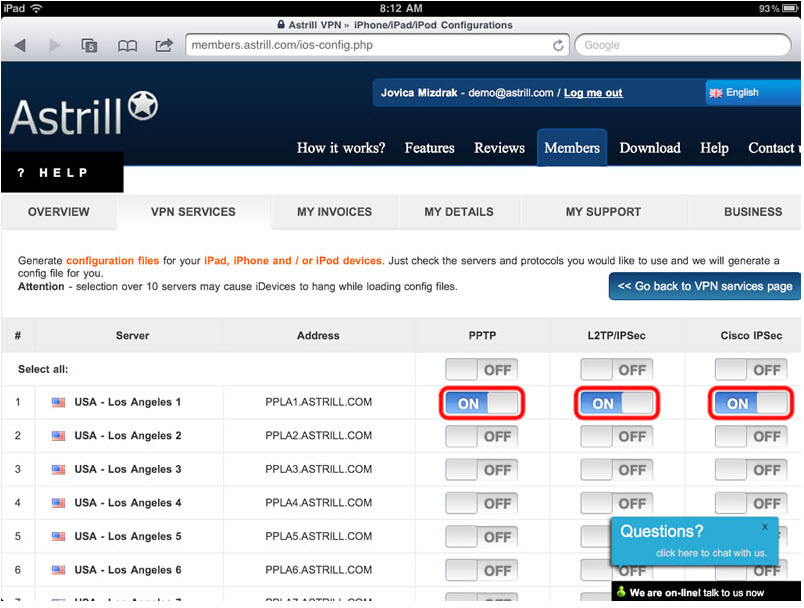
Step 2
Select what VPN locations and what VPN protocols you would like to use on iPad by switching ON/OFF button.
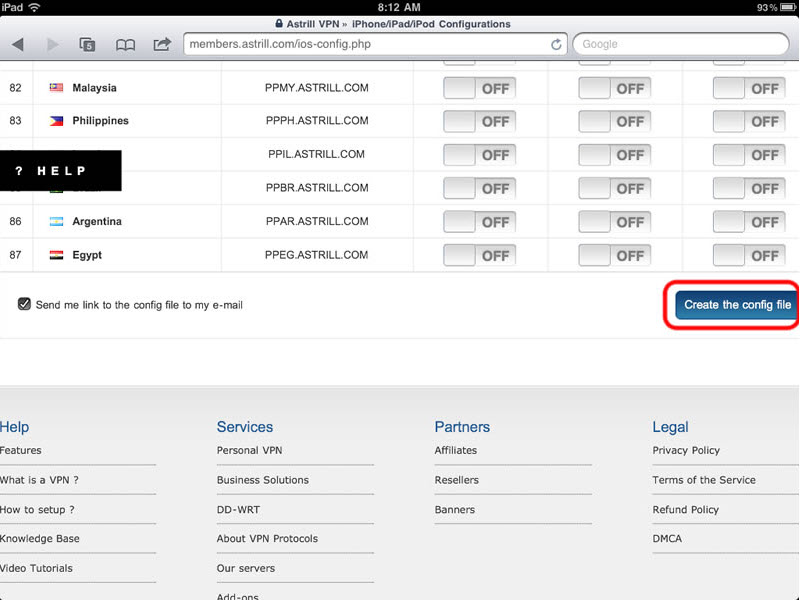
Step 3
After you have made the selections, scroll down and click on "Create the config file" button.
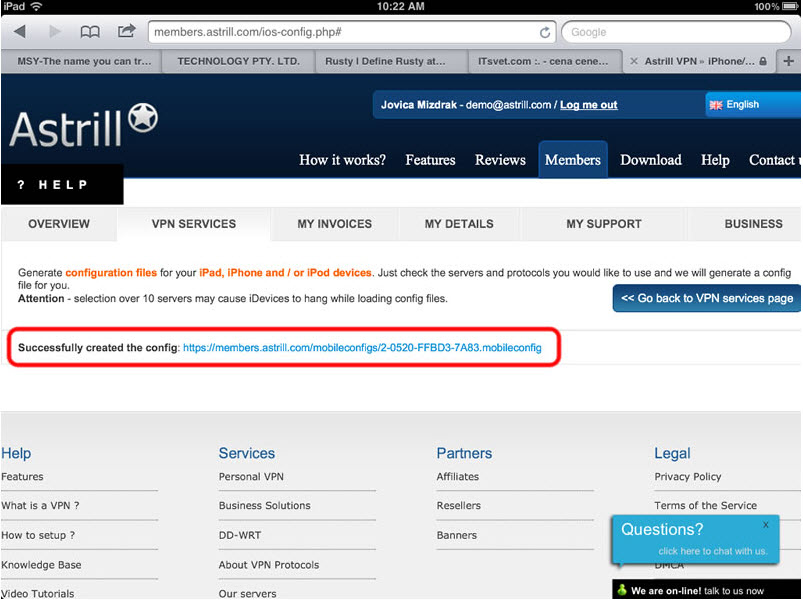
Step 4
Mobileconfig file will be created, click on that link to download to your iPad.
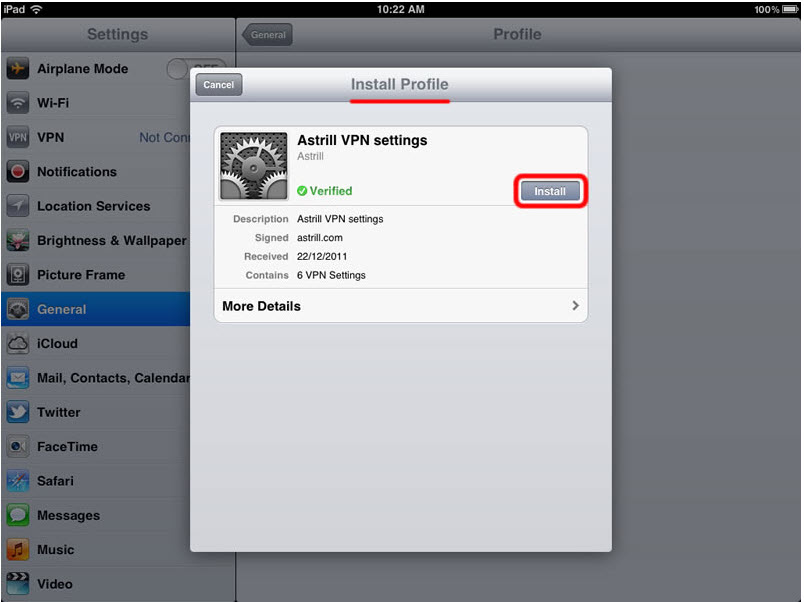
Step 5
You will see "Install Profile" screen, tap on "Install" button.
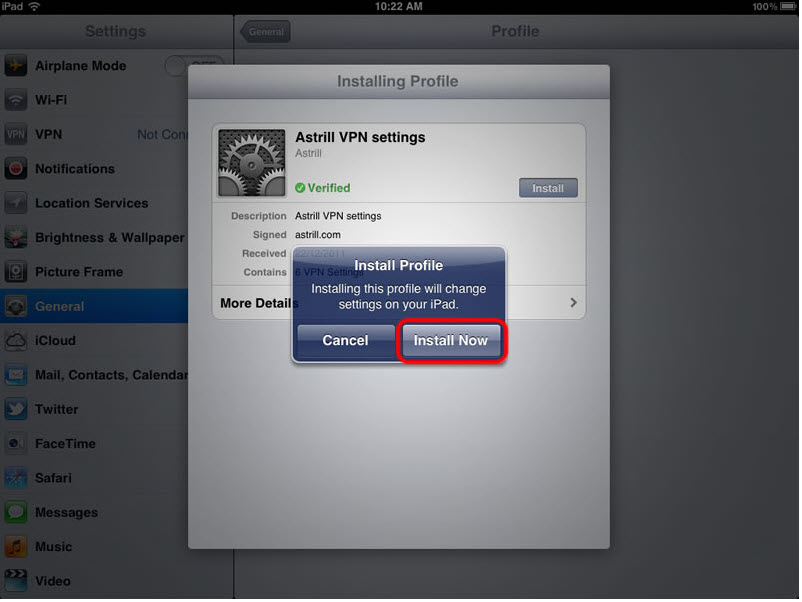
Step 6
You will get a confirmation message box, tap on "Install Now" button.
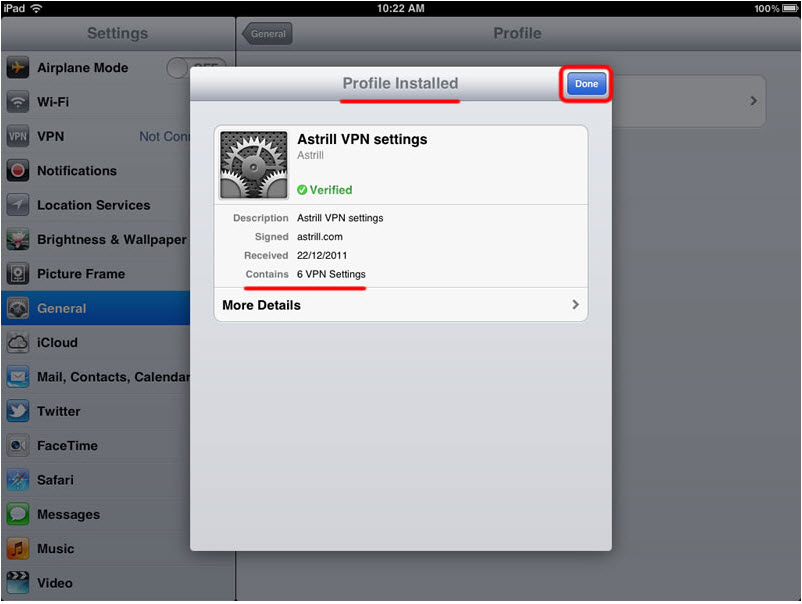
Step 7
You will see "Profile Installed" on the screen, tap "Done" button.
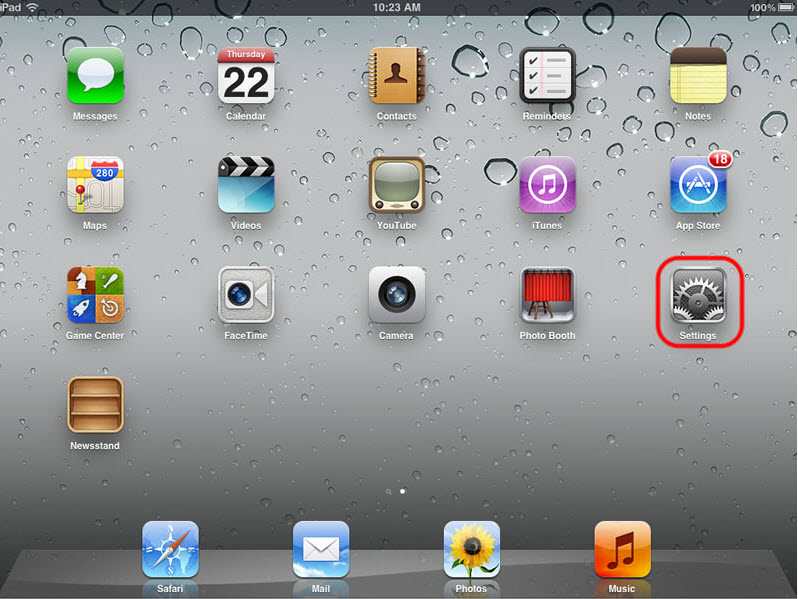
Step 8
Go to main screen, then tap on "Settings" icon.
Step 9
On the Settings screen tap on "VPN" item on the left hand side. You should see all VPN locations and protocols that you have installed on "Astrill VPN" profile. Select the VPN you would like to connect to, and then tap on "OFF" button to start the VPN connection.
Step 10
Once connected, you should see status "Connected" and VPN icon on top bar.
NOTE: When using PPTP/L2TP/IPSec VPN over 3G connection, make sure proxy settings are disabled. As it's likely these protocols can't work over proxy.
