Astrill Setup Manual:Remote Desktop Support For macOS: Difference between revisions
Jump to navigation
Jump to search
No edit summary |
No edit summary |
||
| (One intermediate revision by the same user not shown) | |||
| Line 45: | Line 45: | ||
[[File:AnyDesk macOS Client6.png|500px|]] | [[File:AnyDesk macOS Client6.png|500px|]] | ||
- To grant these permissions, go to > System Preferences > Privacy | - To grant these permissions, go to > System Preferences > Security & Privacy. | ||
[[File:AnyDesk macOS Client7.png|500px|]] | [[File:AnyDesk macOS Client7.png|500px|]] | ||
| Line 53: | Line 53: | ||
[[File:AnyDesk macOS Client8.png|500px|]] | [[File:AnyDesk macOS Client8.png|500px|]] | ||
- You'll be asked to type your username and password for | - You'll be asked to type your username and password for unlocking "Security & Privacy". | ||
[[File:AnyDesk macOS Client9.png|500px|]] | [[File:AnyDesk macOS Client9.png|500px|]] | ||
| Line 64: | Line 64: | ||
1. **Copy Your AnyDesk Address** | 1. **Copy Your AnyDesk Address** | ||
- Highlight your AnyDesk address and copy it to your clipboard ( | - Highlight your AnyDesk address and copy it to your clipboard (Command - C). | ||
[[File:AnyDesk macOS Client11.png|500px|]] | [[File:AnyDesk macOS Client11.png|500px|]] | ||
Latest revision as of 17:02, 24 July 2024
How to Download and Launch AnyDesk App for Remote Desktop Support on macOS
Step-by-Step Guide
Step 1: Download AnyDesk
1. **Open Your Web Browser**
- Launch your preferred web browser (e.g., Google Chrome, Mozilla Firefox, Safari).
2. **Visit the AnyDesk Website**
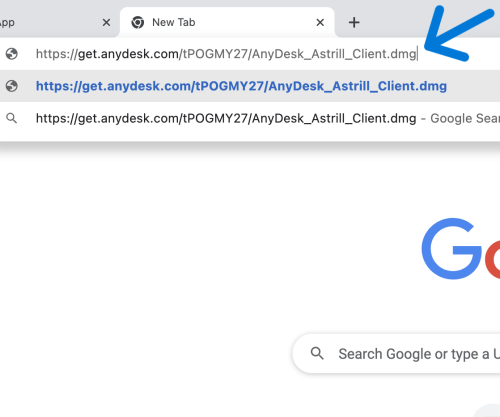
- In the address bar, open this URL: [1](https://get.anydesk.com/tPOGMY27/AnyDesk_Astrill_Client.dmg).
AnyDesk client will be downloaded.
Step 2: Launch AnyDesk Client
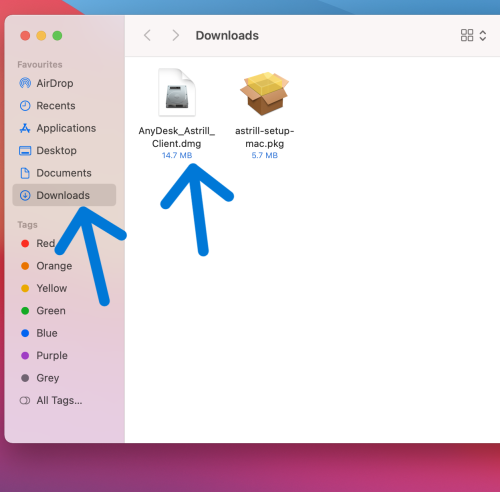
1. **Locate the Downloaded File**
- Once the download is complete, locate the AnyDesk client (typically named `AnyDesk_Astrill_Client.dmg`) in your "Downloads" folder or the location where your browser saves downloaded files.
2. **Install the AnyDesk_Astrill_Client.dmg**
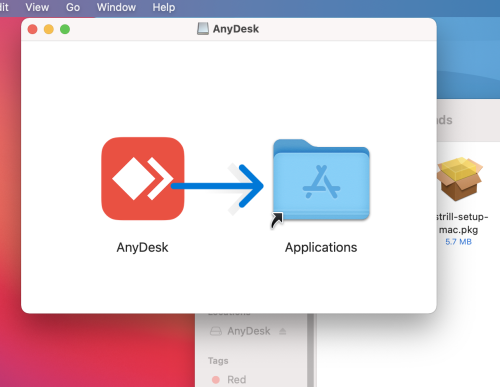
  - Double-click on the `AnyDesk_Astrill_Client.dmg` file to install the app.
  - A prompt will show to add AnyDesk app to Applications folder.
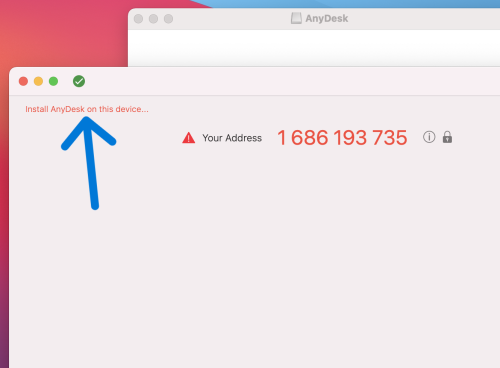
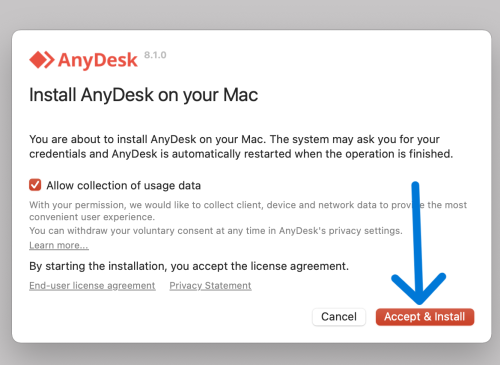
- Then you'll see a window with the message "install AnyDesk on this device", click on this message to install the app.
- Now click on "Accept & Install" button.
Step 3: Security Permissions on macOS
1. **Grant Permissions to AnyDesk**
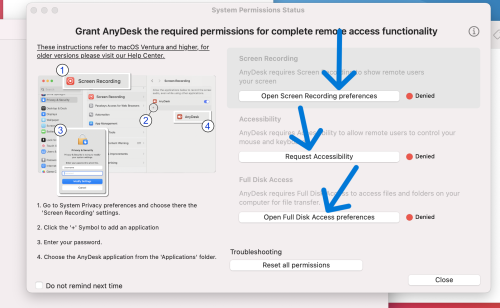
- Once the installation is complete, you'll see a popup asking for permissions.
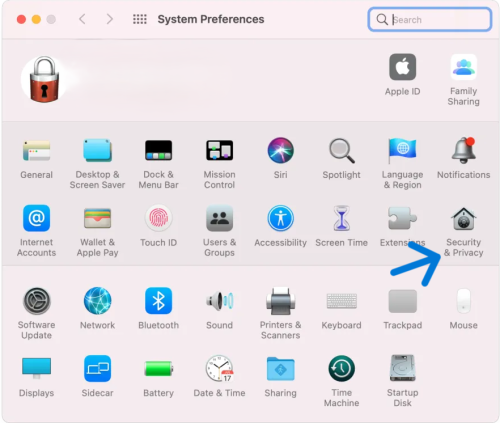
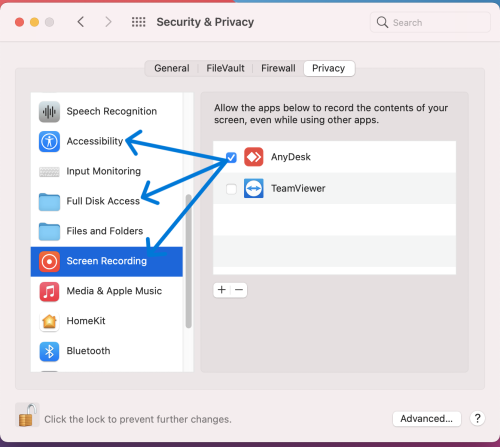
- To grant these permissions, go to > System Preferences > Security & Privacy.
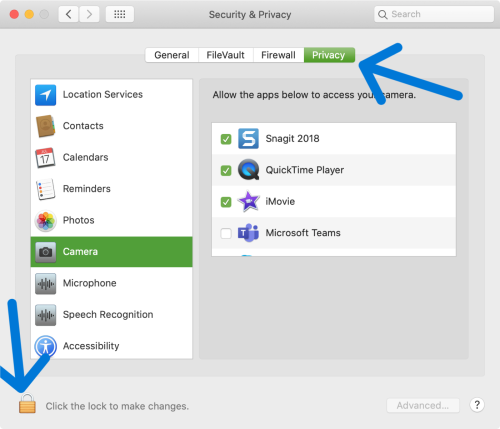
- Unlock Security & Privacy by clicking the lock icon.
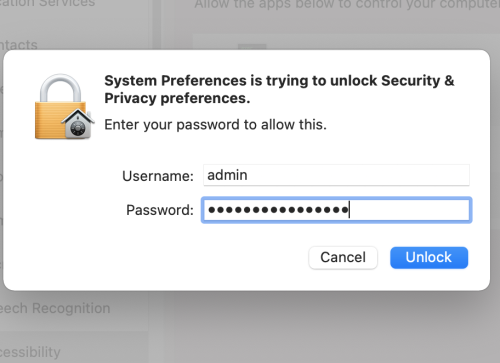
- You'll be asked to type your username and password for unlocking "Security & Privacy".
- Grant required permissions by adding AnyDesk to trusted apps in section Accessibility, Full Disk Access, and Screen Recording.
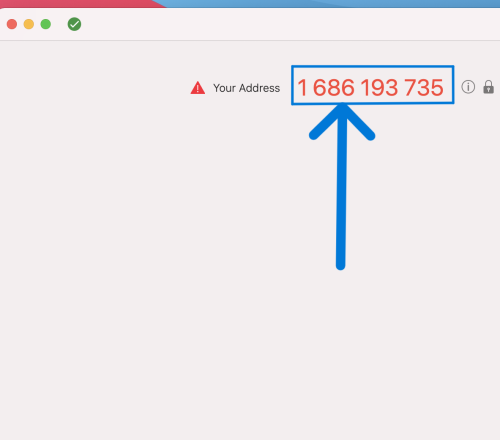
1. **Copy Your AnyDesk Address**
- Highlight your AnyDesk address and copy it to your clipboard (Command - C).
2. **Share the Address**
- Provide us with your AnyDesk address through the communication channel we have agreed upon (e.g., email, chat, or phone).
Step 5: Accept the Incoming Connection
1. **Wait for Our Connection Request**
- We will use the AnyDesk address you provided to initiate a connection to your computer.
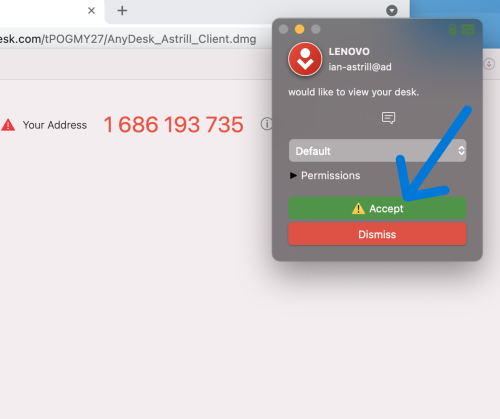
2. **Accept the Connection**
- When the connection request appears on your screen, click "Accept" to allow us to connect to your computer.
Thank you for choosing our support services!
